Thursday 27 February 2020

Photoshop - Animal Skin Swap 3

Photoshop - Animal Skin Swap


Eagle

Zebra Print

MONKEY

Fire Texture

Layers
Zebkeyle
  • First I picked my images, I picked monkey, eagle, zebra print, and fire texture.
  • I worked on the monkey first by using the quick selection tool and selecting the monkey and vector mask it, to get rid of the background.
  • Next I opened the eagle in a different tab and using the square tool, I selected the wings right and left wing separately and copy and pasted them into the monkey tab.
  • I had move them under the monkey layer and rotate the wings in place so look right on the monkey.
  • Then I used the quick selection tool on the wings and vector mask both of them to get rid of the background.
  • Next place the zebra print in and over the monkey then I crt click the monkey layer and click on the zebra layer and vector masked it, this put the zebra print onto the monkey. I had to eraser some parts that didnt fit. Then I did the same for the fire texture and the two wings, selected them and the fire and vector mask it, so the wings are on fire.
  • Then I changed the hue to -7 so the fire on the wings are more noticeable and added a background  with shadows with the burn tool.
  • Lastly added my watermark.

Wednesday 26 February 2020

Photoshop - Animal Skin Swap 2


Skin Swap 2


Gold Texture 


Angel Statue 


Golden Angel Statue

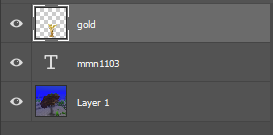
Layers
  • First thing I did was get my statue and texture, I picked gold
  • Then I masked out the background with the quick selection tool and also pressing q and using the brush and eraser to help get the small corners like the wings.
  • After that I duped it and put filters on, first was noise-> median with a level 3 and then Blur -> Gaussian blur with a level 1.2 and then I made a new layer under the one I'm working on and painted the whole background white and merged the two. I duped it but under destination and in document change it to new and saved it.This opens it in a different tab, i just saved it again and named it displacement  This is the displacement I'll be using later.
  • Now I bring in the gold texture into the same canvas as the statue and put it on top. Then I added the filter distort->displacement with a level of 40,40 to the texture layer and it ask for a psd, i picked the displacement I made before. This will put the texture onto the statue but there's still extra texture.I ctrl click the statue layer and clicker on the texture layer and click vector mask, this will get rid of extra texture but you can't see and details of the stature, so I clicked on the texture and change it from normal to overlay. This makes the stature turn gold.
  • After that I merge the two layers of the texture and statue to make it easier to move. And imputed a background, also burn tool around the bottom and around the statue for shadow effects, lastly i put my watermark.

Thursday 20 February 2020

Photoshop - Animal Skin Swap 1


Photoshop - Animal Skin Swap


Cool Dog


Frog


Cool Dog with dark frog skin


Layers

  • First thing I did was pick two images, I picked this dog and frog
  • Next I used the quick selection tool to only selection the dog and i vector masked it, I did the same with the frog.
  • After that i lined them up as closely as i could.
  • Then i went into filters while on the frog layer and used the liquify tool and make some of the frog skin fit on the dog and made sure it wasn't on the hat
  • After i had to erased some and clone some on frog texture.
  • Then I merged them to move and put a background with shadows with the burn tool and added my watermark

Thursday 13 February 2020

Photoshop Morphing - YOUR OWN tutorial


- Photoshop Morphing - Bizard -


Lizard


Bird


Bizard (My version)

  • I got the images then i copy the lizards head and flip it so its the right way
  • I lined it up how i wanted it and i erased the background 
  • then i erased some of the neck but i turned the opacity down to 40
  • I color balance the head a bit more green to match the colour better
  • I also used the clone tool make the head fit better 
  • After all that i duplicate them and merged them together making one item
  • and i changed the background by masking the bizard and putting a background behind it,also added some shadows with the burn tool
  • Lastly added my water mark


Layers


Tutorial's Version

Monday 10 February 2020

Photoshop Morphing - CassoGirafurtle

- Photoshop Morphing - CassoGirafurtle -


Cassowary


Matamata Turtle


Giraffe
  • First thing i did was get the images and decide how i wanted to use them
  • I used the turtle as the body so i mask the other two animal parts i wanted
  • I put them together and cloned the giraffe's neck to make it wider so it would fit
  • I tried making the neck blue but i didn't work, it did work for the shell tho
  • After that i made a copy of it and merged them and mask to put them on a background
  • and i copied them to more of the thing
  • and added some burn on it on the underside of it 
  • Lastly put my watermark


CassoGirafurtle


Layers 

Croco Frog


- Photoshop Morphing - CrocoFrog -


Original Frog


Original Crocodile


CrocoFrog


Layers

  • I did not use the mask tool but i used the eraser tool because i did not know how to mask
  • I lined them up and cloned to make it fit better 
  • I colour balance the croc's head to match the colour of the frog better and erased the mouth and teeth 
  • i used the dodge and the burn tool to brighten and darken areas
  • i also added a background with my watermark by using the masking tool

Wednesday 5 February 2020

Two Tutorial Post


- 🦎Two Tutorial Post🐦 -


Title:

Photoshop Tutorial - Photo manipulation animals

Url:
https://www.youtube.com/watch?v=uiEb4MuQlK8


Video:


Title:
Realistically add images or photos to your skin - Photoshop Tutorial

Url:
https://www.youtube.com/watch?v=nUVkxtJoDaw

Video: