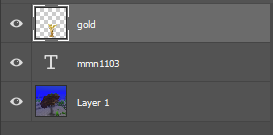
Layers
|
- First thing I did was get my statue and texture, I picked gold
- Then I masked out the background with the quick selection tool and also pressing q and using the brush and eraser to help get the small corners like the wings.
- After that I duped it and put filters on, first was noise-> median with a level 3 and then Blur -> Gaussian blur with a level 1.2 and then I made a new layer under the one I'm working on and painted the whole background white and merged the two. I duped it but under destination and in document change it to new and saved it.This opens it in a different tab, i just saved it again and named it displacement This is the displacement I'll be using later.
- Now I bring in the gold texture into the same canvas as the statue and put it on top. Then I added the filter distort->displacement with a level of 40,40 to the texture layer and it ask for a psd, i picked the displacement I made before. This will put the texture onto the statue but there's still extra texture.I ctrl click the statue layer and clicker on the texture layer and click vector mask, this will get rid of extra texture but you can't see and details of the stature, so I clicked on the texture and change it from normal to overlay. This makes the stature turn gold.
- After that I merge the two layers of the texture and statue to make it easier to move. And imputed a background, also burn tool around the bottom and around the statue for shadow effects, lastly i put my watermark.
|
No comments:
Post a Comment